

Transitioning to an electric vehicle brings the undeniable convenience of overnight home charging. However, shifting from a standard 120-volt wall outlet (Level 1) to a dedicated 240-volt Level 2 charger setup requires deliberate electrical planning. A Level 2 charger functions as a continuous high-amperage electrical load, often drawing 32 to 48 amps for hours at a time, making it one of the largest power draws in a modern home.
Preparing your garage requires evaluating your current electrical distribution system, determining whether your main panel can safely support the additional demand, and executing a code-compliant installation that protects both your property and your vehicle.
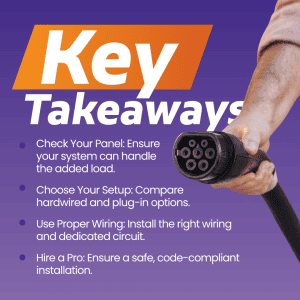
1. Evaluating Your Current Electrical Capacity
Before mounting hardware or purchasing a charging unit, a complete evaluation of your home’s main service panel is essential. Standard Level 1 charging adds minimal strain to a household branch circuit, but Level 2 charging demands dedicated 240-volt power delivery.
Main Service Panel Ratings
Older homes often operate on 100-amp main service panels. When factoring in existing continuous loads, such as central air conditioning, electric water heaters, and kitchen ranges, adding a 40-amp or 50-amp dedicated EV circuit can push an aging panel past its safe operational threshold. Modern homes typically feature 200-amp service, which generally provides sufficient busbar headroom for EV chargers.
If your panel lacks physical slot space or total available load capacity, an electrical panel installation or targeted service upgrade becomes a mandatory precursor to your charger setup.
Calculating Continuous Load
The National Electrical Code (NEC) classifies EV charging as a continuous load, meaning the circuit breaker and conductors must be rated for 125% of the charger’s maximum output. For example:
- A 32-amp charger requires a 40-amp circuit breaker.
- A 48-amp charger requires a 60-amp circuit breaker.
Overlooking this load calculation can result in nuisance breaker trips, internal busbars overheating, or premature failure of electrical connections.
2. Hardwired vs. Plug-In Level 2 Charger Setups
When choosing how your Level 2 equipment integrates into your garage, you have two primary options: a hardwired installation or a plug-in setup using a NEMA 14-50 receptacle.
Hardwired Installations (Recommended for High Output)
- Higher Power Delivery: Allows for 48-amp charging (requiring a 60-amp circuit), unlocking maximum charging speed for vehicles with larger battery packs.
- Superior Thermal Reliability: Direct conductor connections eliminate physical plug contacts, reducing potential failure points under sustained current.
- Weather & Environment Protection: Ideal for garages prone to temperature swings or outdoor mounting locations.
Plug-In Installations (NEMA 14-50 Receptacle)
- Flexibility: Allows you to easily unplug and relocate the charging unit if you move.
- Capped Amperage: Restricted to a maximum 40-amp continuous output (on a 50-amp breaker) per safety standards.
- GFCI Breaker Requirements: Code mandates a GFCI circuit breaker for receptacle installations, which can occasionally cause nuisance tripping with chargers that feature built-in self-testing circuits.
3. Dedicated Circuitry and Safe Cable Routing
A proper panel upgrade for EV chargers or dedicated line installation involves running correctly gauged copper conductors directly from your main breaker box to the designated garage mounting site.
- Conductor Sizing: Heavy-gauge copper wire (such as 6 AWG or 4 AWG, depending on distance and amperage) must be used to prevent line voltage drops and thermal buildup over long runs.
- Physical Protection: Wiring inside a garage must be shielded within heavy-duty, impact-resistant conduit (such as THHN inside EMT conduit) to protect against accidental contact from vehicle doors, tools, or lawn equipment.
- Strategic Placement: Mounting the unit within 15 to 20 feet of your vehicle’s charge port minimizes cable strain and keeps heavy charging cords safely off the garage floor.
4. The Decision-Maker’s Cheat Sheet
To help you choose the ideal setup for your garage and driving habits, review the actionable options below:
Level 2 Charger Setup Options
| Option Feature | Plug-In Setup (NEMA 14-50) | Hardwired Setup (Standard) | High-Output Hardwired |
| Max Output / Charging Speed | ~30 miles of range / hour (40A max output) | ~37 miles of range / hour (40A output) | ~44+ miles of range / hour (48A output) |
| Required Circuit Breaker | 50-Amp Double-Pole (GFCI) | 50-Amp Double-Pole | 60-Amp Double-Pole |
| Best Suited For | Renters or homeowners planning to move soon | Standard daily commuting and overnight charging | High-mileage drivers & dual-EV households |
| Key Advantage | Easy unit replacement or removal | High thermal reliability; no plug failure point | Maximum charging speed allowed on residential power |
| Panel Capacity Requirement | Moderate headroom required | Moderate headroom required | High capacity required (often needs 200A panel) |
5. Why Professional Installation Matters
Installing a high-power branch circuit is not a weekend DIY project. Improper torque on breaker terminals, undersized conductor selection, or uncalculated panel strain present severe property risks.
Working with licensed, specialized electricians ensures:
- Accurate digital load calculations prior to installation.
- Strict adherence to municipal permit guidelines and utility coordination.
- Clean physical placement with zero loose wires or exposed connections.
- Long-term peace of mind backed by solid craftsmanship warranties.
Ready to Upgrade Your Garage Power?
Triple Check Electric provides precision Level 2 charging station setups across Omaha and surrounding communities. We evaluate your home’s existing service panel, provide clear, upfront options, and execute clean, code-compliant installations. Every complete installation is backed by our lifetime craftsmanship guarantee.
Give us a call at 402-431-3025 or visit Calltriplecheck.com to schedule your installation consultation.
FAQ
1. Will installing a Level 2 EV charger require a full electrical panel upgrade?
Not always, but it depends on your home’s existing service panel capacity and current electrical loads. Homes with 200-amp service panels usually have sufficient capacity, whereas older 100-amp or 125-amp panels often require a service upgrade or a subpanel installation to safely handle a continuous 40- to 60-amp load.
2. What is the difference between a Level 1 and a Level 2 charger?
A Level 1 charger plugs into a standard 120-volt household outlet and delivers roughly 3 to 5 miles of range per hour of charging. A Level 2 charger operates on a dedicated 240-volt circuit and delivers 30 to 44+ miles of range per hour, allowing most vehicles to fully recharge overnight.
3. Is it better to hardwire an EV charger or install a 240-volt outlet?
Hardwiring is generally recommended for long-term home setups. Hardwired connections support higher charging speeds (up to 48-amp output on a 60-amp breaker) and eliminate plug-and-socket thermal wear. Plug-in setups offer flexibility if you plan to move, but are capped at a lower maximum amperage output.
4. What warranties come with your electrical installations?
At Triple Check Electric, we stand firmly behind our work. All our installations, including EV chargers, lighting setups, and dedicated circuits, are backed by our lifetime craftsmanship guarantee. Additionally, all electrical panel upgrades include a dedicated 5-year parts and labor warranty for complete long-term peace of mind.